AED
AED AFN
AFN ALL
ALL AMD
AMD ANG
ANG AOA
AOA ARS
ARS AUD
AUD AWG
AWG AZN
AZN BAM
BAM BBD
BBD BDT
BDT BGN
BGN BHD
BHD BIF
BIF BMD
BMD BND
BND BOB
BOB BRL
BRL BSD
BSD BTN
BTN BWP
BWP BYN
BYN BZD
BZD CAD
CAD CDF
CDF CHF
CHF CLF
CLF CLP
CLP CNH
CNH CNY
CNY COP
COP CRC
CRC CUC
CUC CUP
CUP CVE
CVE CZK
CZK DJF
DJF DKK
DKK DOP
DOP DZD
DZD EGP
EGP ERN
ERN ETB
ETB EUR
EUR FJD
FJD FKP
FKP GEL
GEL GGP
GGP GHS
GHS GIP
GIP GMD
GMD GNF
GNF GTQ
GTQ GYD
GYD HKD
HKD HNL
HNL HRK
HRK HTG
HTG HUF
HUF IDR
IDR ILS
ILS IMP
IMP INR
INR IQD
IQD IRR
IRR ISK
ISK JEP
JEP JMD
JMD JOD
JOD JPY
JPY KES
KES KGS
KGS KHR
KHR KMF
KMF KPW
KPW KRW
KRW KWD
KWD KYD
KYD KZT
KZT LAK
LAK LBP
LBP LKR
LKR LRD
LRD LSL
LSL LYD
LYD MAD
MAD MDL
MDL MGA
MGA MKD
MKD MMK
MMK MNT
MNT MOP
MOP MRU
MRU MUR
MUR MVR
MVR MWK
MWK MXN
MXN MYR
MYR MZN
MZN NAD
NAD NGN
NGN NIO
NIO NOK
NOK NPR
NPR NZD
NZD OMR
OMR PAB
PAB PEN
PEN PGK
PGK PHP
PHP PKR
PKR PLN
PLN PYG
PYG QAR
QAR RON
RON RSD
RSD RUB
RUB RWF
RWF SAR
SAR SBD
SBD SCR
SCR SDG
SDG SEK
SEK SGD
SGD SHP
SHP SLE
SLE SLL
SLL SOS
SOS SRD
SRD SSP
SSP STD
STD STN
STN SVC
SVC SYP
SYP SZL
SZL THB
THB TJS
TJS TMT
TMT TND
TND TOP
TOP TRY
TRY TTD
TTD TWD
TWD TZS
TZS UAH
UAH UGX
UGX USD
USD UYU
UYU UZS
UZS VES
VES VND
VND VUV
VUV WST
WST XAF
XAF XCD
XCD XCG
XCG XOF
XOF XPF
XPF YER
YER ZAR
ZAR ZMW
ZMW ZWG
ZWG ZWL
ZWLCyanotype Process Chemicals - 100gms Potassium Ferricyanide + 250gms Ferric Ammonium Citrate
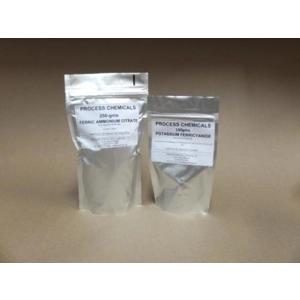
Cyanotype Process Chemicals - 100gms Potassium Ferricyanide + 250gms Ferric Ammonium Citrate
This Product cannot Be Sent by Post, Please choose Next Day Courier
The formula
This recipe makes approximately 50 8×10 inch prints. The cyanotype is made up of two simple solutions:
- Solution A: 25 grams Ferric ammonium citrate (green) and 100 ml. water.
- Solution B: 10 grams Potassium ferricyanide and 100 ml. water.
1 Mixing the chemicals
Dissolve the chemicals in water to make two separate solutions. Add Ammonium ferric citrate to water into one container and Potassium ferricyanide to water in another. Stir with a plastic spoon until the chemicals dissolve. Mix equal quantities of each solution together in a third container. Unused solutions can be stored separately in brown bottles away from light, but will not last very long once they have been mixed. Dispose of any unused chemicals in a sensible and environmentally friendly way!
Your work area
Your floors, carpets, walls, work surfaces, clothes and skin can be stained by the chemicals. Cover all possible areas, use rubber gloves and an apron or an old shirt to work in. If you have the space, choose an area where you can spread out. Ordinary light bulbs or tungsten light is safe to use, but UV light will affect your prints. Some fluorescent lighting may also affect your prints.
2 Preparing the canvas
Using a brush, simply paint the chemicals onto the material. Paper, card, textiles or any natural material can be used to print on. Decide how big your print is going to be, and cut your material to size. Make sure your working area is dimly lit, or lit with a low-level tungsten bulb. Once the material is coated, leave it to dry in the dark.
3 Printing the cyanotype
Print a cyanotype by placing your negative (to reproduce a photograph) or object (to make a photogram) in contact with your coated paper or fabric. Sandwich it with a piece of glass. Expose the sandwich to UV light. Natural sunlight is the traditional light source, but UV lamps can also be used. A photogram can also be made by placing items on the surface. Plants, decorative items or other objects can be used to create silhouettes or interesting shapes. Exposure times can vary from a few minutes to several hours, depending on how strong your lightsource is or the season where you are printing.
4Processing and drying
When the print has been exposed, process your print by rinsing it in cold water. The wash also removes any unexposed chemicals. Wash for at least 5 minutes, until all chemicals are removed and the water runs clear. Oxidation is also hastened this way – bringing out the blue color. The final print can now be hung to dry and be admired.
Good luck!